


POS Terminal Touch Sensitivity Optimization Guide for Better Performance
Are you tired of customers tapping your screen three times just to process a single payment?
A lagging screen isn’t just annoying; it kills your checkout speed.
As a retail tech expert, I know that precise POS terminal Touch Sensitivity Optimization is the difference between a frustrated line and a seamless transaction.
In this guide, I’m going to show you exactly how to calibrate your hardware for instant responsiveness.
These are the proven tweaks that keep lines moving.
Let’s dive right in.
Understanding Common Touchscreen Issues
In the fast-paced world of retail and hospitality, a responsive POS terminal is the backbone of efficient service. When your hardware starts acting up, it creates friction at the checkout. We design our SDL POS systems to withstand heavy daily use, but understanding the root cause of sensitivity problems is the first step toward optimization.
Identifying Ghost Touches and Phantom Clicks
Ghost touches occur when your POS screen registers input that you didn’t make. This phenomenon often looks like an invisible finger is tapping apps or closing windows. In an industrial setting, this is frequently caused by:
- Static electricity buildup on the screen surface.
- Power supply fluctuations affecting the digitizer.
- Debris or moisture trapped under the bezel (common in kitchens).
Our aluminum alloy housing helps mitigate some of these electrical interference issues by providing better grounding and stability compared to plastic chassis.
Recognizing Dead Spots and Unresponsiveness
If you find yourself tapping the same “Pay” button three times before it registers, you are dealing with touch screen dead zones. These are specific areas on the panel that fail to detect input.
- Drift: The touch point is misaligned from the visual button.
- Physical Damage: A micro-fracture in the digitizer glass.
- Wear and Tear: Common in older resistive screens where specific points are pressed thousands of times.
Distinguishing Between Lag and Hardware Failure
Before replacing hardware, we must determine if the issue is touch response lag or actual component failure.
- Lag: The screen registers the touch, but the system takes seconds to react. This is often a resource issue (CPU/RAM) rather than a screen defect. Our terminals equipped with Intel Core i3/i5 processors are designed to eliminate this processing bottleneck.
- Hardware Failure: The screen creates no input signal whatsoever. This usually indicates a broken digitizer cable or a failed controller board.
Resistive vs. Capacitive Screen Behaviors
The type of screen technology you use dictates how you troubleshoot sensitivity. We manufacture both types to suit different environments:
| Feature | Resistive Touch | Projected Capacitive (PCAP) |
|---|---|---|
| Input Method | Pressure-based (requires a firm press). | Electrical current (responds to light touch). |
| Sensitivity | Lower; feels “heavier” to use. | High sensitivity; supports 10-point multi-touch. |
| Common Issue | Surface wear reduces accuracy over time. | Water droplets or thick gloves can trigger erratic input. |
| Best Use | Harsh environments where stylus/gloves are used. | High-speed retail and modern hospitality. |
Most modern businesses prefer our 10-point PCAP screens for their smartphone-like responsiveness and durability, as they lack the flexible top layer that wears out on resistive models.
Basic Maintenance and Cleaning Protocols
POS terminal Touch Sensitivity Optimization often starts with a simple rag and the right cleaner. In my experience manufacturing industrial hardware, over 50% of reported “touch failures” are actually just dirty screens. When you are running a high-volume retail store or a busy kitchen, layers of grease, dust, and moisture build up on the display. This creates a barrier between the finger and the digitizer, leading to touch response lag or complete unresponsiveness.
Proper Cleaning Agents for POS Screens
You cannot just grab a bottle of generic glass cleaner and spray it down. Ammonia-based cleaners can strip the oleophobic coating off a capacitive touch screen, making it harder to glide your finger and actually increasing drag.
- Best Practice: Use a microfiber cloth slightly dampened with 70% Isopropyl Alcohol or a dedicated screen cleaner.
- The “Don’t” List: Avoid paper towels (they scratch), ammonia, and bleach.
- Waterproofing: Since our SDL terminals feature IP65-rated front panels, you can wipe them down confidently without worrying about liquid seeping into the bezel, but you should still avoid spraying liquid directly onto the screen.
Removing Debris from Bezel Edges
This is the most common cause of the dreaded “ghost touch.” If a crumb, salt grain, or hardened grease gets wedged between the glass and the plastic housing, the sensor thinks you are pressing down constantly. This confuses the controller and blocks new inputs.
In high-traffic environments like cash register systems for quick-service restaurants, grease and food particles are the number one enemy of touch precision. I recommend using a can of compressed air or a soft-bristled brush to clear out the corners of the frame weekly. This simple ghost touch fix can save you from buying new hardware unnecessarily.
Impact of Screen Protectors and Physical Damage
We build our terminals with industrial-grade glass meant to withstand heavy tapping, but some users still add aftermarket screen protectors. Be careful here. A thick, low-quality plastic sheet acts as an insulator, killing capacitive touch screen sensitivity. If you must use one, ensure it is rated for PCAP screens.
Finally, inspect the unit for warping. If the aluminum housing is bent due to a drop or extreme heat, it can physically twist the glass, causing touch screen dead zones. Regular physical inspections ensure that your hardware remains the backbone of your operation, not a bottleneck.
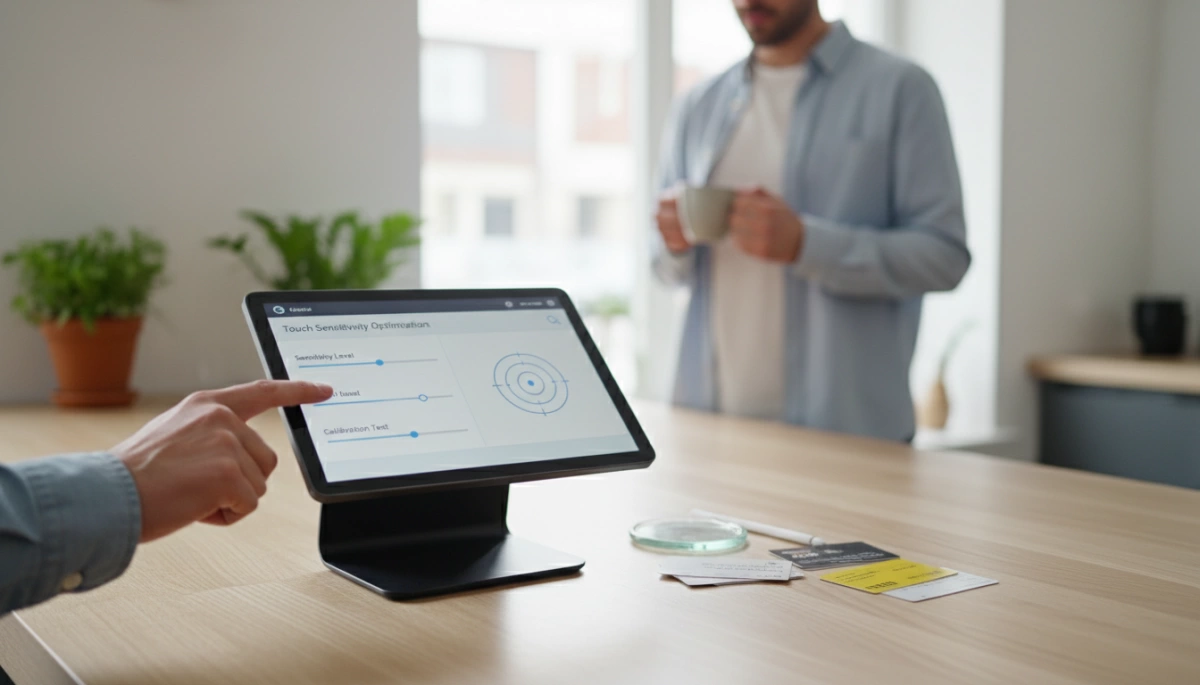
Calibrating Your POS Touchscreen Settings
When your hardware is physically clean but still acting up, software calibration is the next logical step for POS terminal Touch Sensitivity Optimization. In my experience manufacturing POS hardware, misalignment between the display image and the touch sensor is a leading cause of user frustration. Getting this right ensures your staff isn’t tapping the “Void” button when they meant to hit “Enter.”
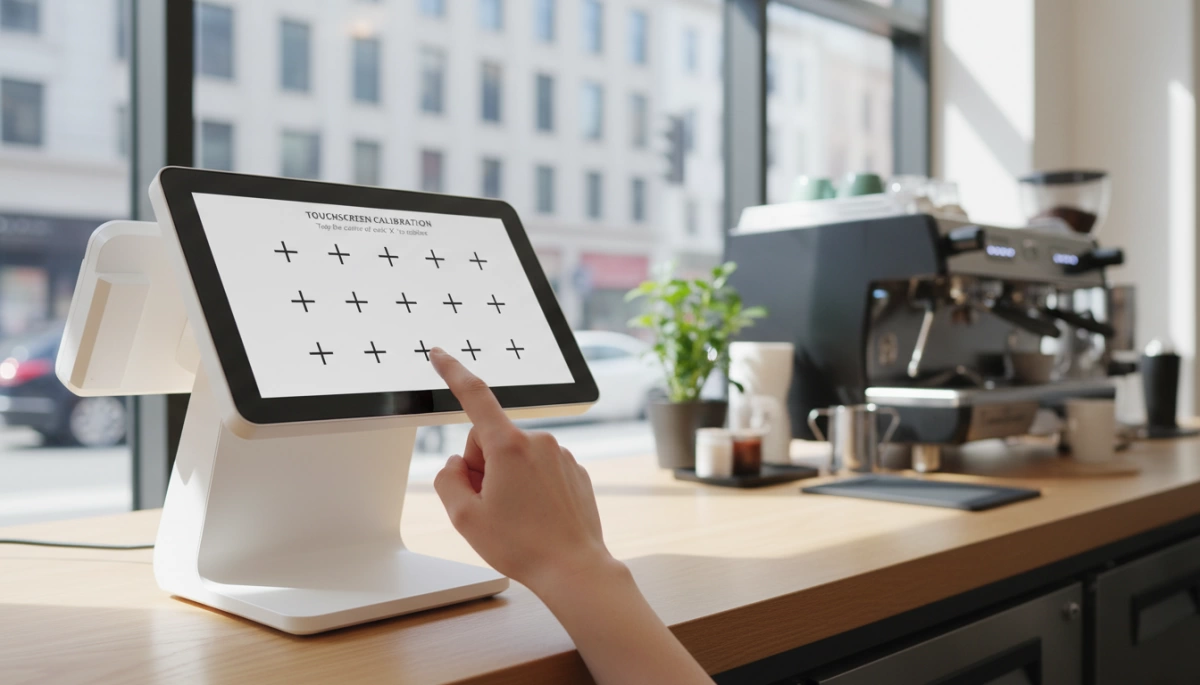
Accessing Windows Calibration Tools
For the vast majority of retail setups running Windows, the operating system has a built-in utility that fixes most POS screen calibration drift. This is especially common after a resolution change or a driver update.
- Open Control Panel and select Tablet PC Settings.
- Click the Calibrate button under the Display tab.
- Follow the crosshairs on the screen, tapping specifically in the center of each target.
- Save the data to update the Windows touch settings.
If the system doesn’t recognize your inputs during this process, you might be dealing with a deeper driver conflict rather than simple drift.
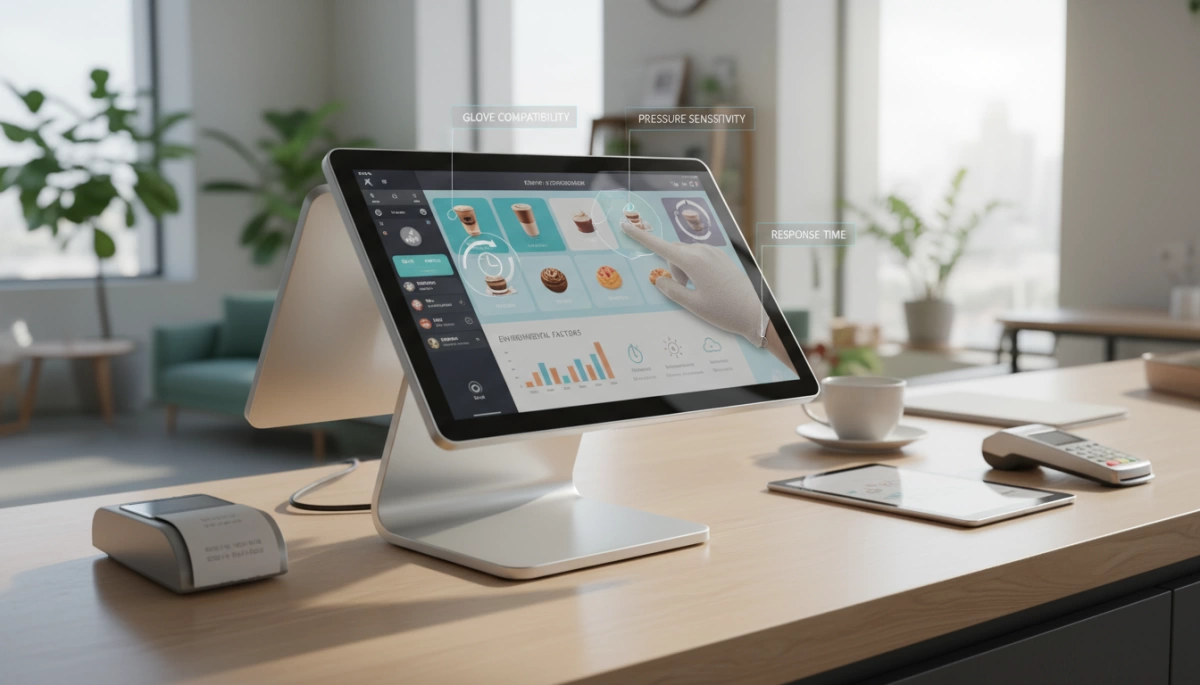
Android Sensitivity Adjustments
Android-based systems, often found in modern wireless POS terminal setups, handle touch differently. While they rarely require the “crosshair” calibration typical of older Windows units, you can still tweak responsiveness.
- Pointer Speed: Navigate to Settings > System > Languages & input. Increasing the pointer speed can sometimes make the touch interface feel snappier.
- Touch Sensitivity Mode: Some ruggedized Android terminals include a specific toggle for “Glove Mode” or high sensitivity, which boosts the signal-to-noise ratio on the digitizer.
Recalibrating Resistive vs. Capacitive Screens
Understanding your screen type is critical because resistive touch screen settings differ vastly from capacitive ones.
- Resistive Screens: These rely on physical pressure. Over time, the flexible top layer shifts slightly. You must run a 4-point or 9-point calibration tool regularly to realign the touch coordinates with the display.
- Capacitive (PCAP) Screens: Our SDL models typically use 10-point Projected Capacitive technology. Capacitive touch screen sensitivity is generally fixed at the hardware level and does not drift. If a PCAP screen is inaccurate, it usually indicates a grounding issue or a dirty surface rather than a need for coordinate calibration.
Using Manufacturer-Specific Utility Software
Generic Windows drivers are fine for basic mouse emulation, but they often lack the nuance needed for a high-speed retail environment. Always check if your terminal came with a specific utility tool (like eGalax or similar OEM software).
These utilities offer advanced POS hardware troubleshooting options that the OS hides, such as:
- Edge Compensation: Fixing responsiveness at the very corners of the bezel.
- Touch Beep: Audio feedback for confirmed touches.
- Linearization: A deeper form of calibration that corrects non-linear distortion across the panel.
Using the correct utility ensures the digitizer maps perfectly to your display, eliminating those annoying “dead zones” where touches fail to register.
Driver and Firmware Updates
Even the most durable, industrial-grade hardware requires precise software coordination to maintain peak performance. If your terminal’s 10-point PCAP screen feels sluggish, the bottleneck is often in the software layer rather than the physical panel. Regular maintenance of your system’s “brain” ensures the Intel processor communicates instantly with the touch sensors.
- Check for Outdated Touch Drivers: Navigate to the Device Manager in Windows. A simple touch driver update can often resolve latency issues caused by recent operating system upgrades.
- Reinstall Corrupt Drivers: Power surges or improper shutdowns can corrupt driver files. Uninstalling the specific Human Interface Device (HID) driver and rebooting allows the system to reinstall a clean version, effectively resetting your Windows touch settings.
- Update BIOS/UEFI: For deep-level POS hardware troubleshooting, ensure your BIOS is up to date. This firmware controls how the motherboard interacts with peripherals, and an update can fix compatibility issues with newer OS versions.
- Roll Back Updates: Newer isn’t always better. If you notice sensitivity loss immediately after a Windows update, use the “Roll Back Driver” option to revert to the last known stable configuration.
If updating drivers doesn’t resolve the unresponsiveness or if the display fails entirely, these steps are also fundamental to POS black screen troubleshooting and system recovery.
Environmental Factors Affecting Sensitivity
Sometimes the issue isn’t the screen itself, but where it’s located. POS terminal Touch Sensitivity Optimization often requires looking at the external environment, especially in high-traffic US retail or restaurant settings where conditions fluctuate.
Managing Electromagnetic Interference (EMI) & Grounding
If your cursor is jumping around or you are experiencing erratic ghost touches, check your power source. Poor grounding introduces electrical noise that interferes with the capacitive field of the screen.
- Grounding: Ensure the outlet is properly grounded. A floating ground causes the touch controller to misinterpret signals.
- Interference: Keep the terminal away from high-power equipment like microwaves or large motors, which generate EMI that disrupts the digitizer.
Temperature and Humidity Impacts
Extreme environments test the limits of consumer-grade electronics. In a hot kitchen or a cold storage area, standard screens may suffer from low temperature issues or heat-induced lag.
- Heat: Excessive heat can slow down the processor, causing touch response lag. Our aluminum alloy housing is designed to dissipate heat efficiently without fans.
- Moisture: High humidity leads to condensation. If your device isn’t IP-rated, moisture on the bezel can register as a constant touch. We engineer our units with industry fit in mind, ensuring POS hardware durability for international markets withstands moisture and dust ingress.
Lighting and Optical Interference
While our Projected Capacitive (PCAP) screens are resistant to light interference, direct sunlight can still cause issues for older optical touch technologies or cause the unit to overheat.
- Glare: High-intensity lighting can make it hard for users to target buttons accurately, leading to perceived unresponsiveness.
- Sensor Saturation: Avoid placing terminals under direct, high-intensity spotlights if using optical sensors, as this washes out the IR grid.
Pro Tip: For consistent performance in harsh environments, always choose hardware with an IP65-rated front panel to prevent environmental debris from creating dead zones.
Advanced Troubleshooting Techniques
When a simple reboot or calibration doesn’t resolve responsiveness issues, we need to dig deeper into the system architecture. For IT professionals managing POS systems for large-scale distributors, mastering these advanced tweaks is essential to maintaining consistent fleet performance without unnecessary hardware replacements.
Modifying Registry Settings for Latency
In Windows-based SDL terminals (running Intel Core or Celeron processors), the operating system sometimes applies a default smoothing filter that can feel like lag. You can achieve screen latency reduction by adjusting specific registry keys.
- Access the Registry: Open regedit and navigate to the touch input parameters.
- Adjust Latency: Look for values related to TouchPrediction or Latency and minimize them. This tells the OS to prioritize raw input speed over cursor smoothing.
- Note: Always back up your registry before making changes to Windows touch settings.
Adjusting Power Management
A frequent cause of “sleep lag”—where the first touch after a period of inactivity is ignored—is aggressive power saving. Since our PCAP touch panels interface internally via USB, the OS might be cutting power to the controller.
- Disable USB Selective Suspend: Go to Power Options > Advanced Settings > USB Settings and set “USB selective suspend” to Disabled.
- Device Manager Check: Locate the HID-compliant touch screen device, right-click “Properties,” and under “Power Management,” uncheck “Allow the computer to turn off this device to save power.”
Hard Resetting the Hardware Controller
Sometimes the Touch IC (Integrated Circuit) gets stuck in a logic loop that a standard restart won’t clear.
- The Power Drain Method: Shut down the POS terminal completely and unplug the power adapter. Hold the physical power button down for 15–20 seconds. This drains residual electricity from the capacitors, forcing the touch controller to completely re-initialize when you plug it back in.
- Diagnostic Tools: Use specialized diagnostic software to visualize touch inputs. If you see “jitter” (cursor shaking) when no one is touching the screen, you may need to adjust the sensitivity threshold in the driver to filter out static noise.
Frequently Asked Questions (FAQs)
Why does my POS screen register touches I didn’t make?
This phenomenon is known as “ghost touch.” It usually happens when the digitizer detects input from static electricity, poor electrical grounding, or debris trapped between the screen and the bezel. Since our terminals use aluminum alloy housing for better stability, static issues are minimized, but external grounding problems in your building can still cause interference. A quick ghost touch fix often involves cleaning the bezel edges and ensuring the power outlet is properly grounded.
How often should I calibrate my POS terminal?
It depends on the screen technology.
- Capacitive Screens (PCAP): Most of our modern units, like the SDL-7000 series, use 10-point PCAP technology. These rarely require manual calibration as they auto-adjust.
- Resistive Screens: If you are using older pressure-sensitive models, we recommend running POS screen calibration every 3 to 6 months or immediately if you notice touch response lag.
Can a cracked screen still be optimized?
No amount of software tuning can fix physical damage. If the glass is shattered or the underlying sensor is damaged, POS terminal Touch Sensitivity Optimization settings will not restore function. A crack disrupts the electrical field (capacitive) or pressure layers (resistive), creating permanent touch screen dead zones. In this case, a digitizer replacement or a new monitor is the only reliable solution.
Is it a software glitch or a broken digitizer?
To distinguish between a driver conflict and hardware failure, try accessing the BIOS or boot menu.
- Software Issue: If the touch works perfectly in the BIOS but fails in the OS, you likely need a touch driver update or to adjust your Windows touch settings.
- Hardware Failure: If the screen is unresponsive even during the boot process, the digitizer or controller board is likely physically broken.


