


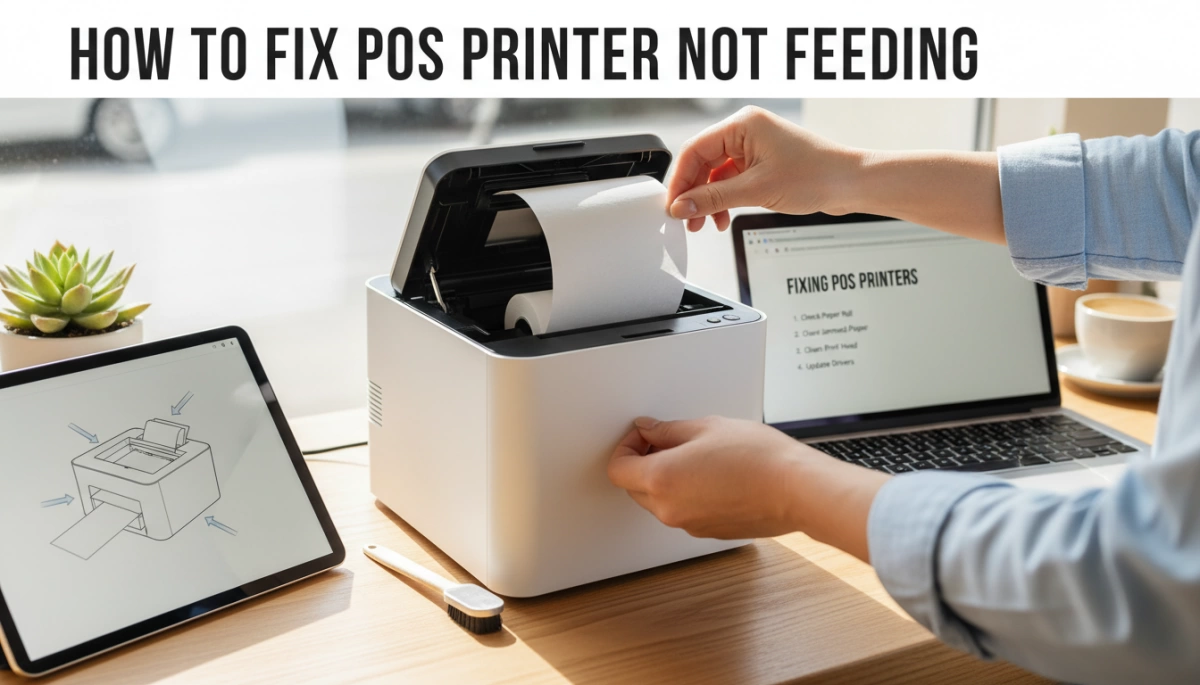
How to Fix POS Printer Not Feeding Paper Fast Guide
Quick Checks Before You Panic
When a POS printer is not feeding paper, your line is growing and everyone is staring at you. Before you assume the printer is dead, run through these fast checks. Most POS printers not feeding are fixed in under 2 minutes.
Basic questions to ask first
Ask yourself:
Did this start right after a paper change?
→ Very often the thermal printer paper is loaded upside down or the roll is stuck.Are any lights red or flashing on the printer?
→ A receipt printer error “paper not loading” or “cover open” will block feeding.Did anything just get moved or unplugged?
→ A loose power brick or USB cable can make a POS receipt printer not pull paper.Does the printer make any noise when you press FEED?
→ No noise = power or board issue.
→ Grinding or weak noise = possible motor or roller problem.
If you can answer these quickly, you will know whether to focus on paper, power, or hardware.
How to safely power cycle the POS printer
A clean power cycle fixes many cases of a thermal POS receipt printer not feeding paper:
- Turn off the printer using the power switch.
- Turn off or close your POS app, and if possible, restart the POS terminal or PC.
- Unplug the printer power adapter from the wall and from the printer for 20–30 seconds.
- Plug the power back into the printer and wall.
- Turn the printer back on first, wait for it to finish its startup, then open your POS app.
You should see the power light solid and hear a short start-up sound. Now press FEED once and check if paper advances.
Check cables, ports, and power adapters
A POS printer not printing but has power is often a cable or adapter issue:
- Confirm the power brick is the original or SDLPOS-approved adapter. Wrong voltage can cause weak feeding.
- Make sure the power cable is fully seated in both the printer and wall or surge bar.
- For USB receipt printers not feeding, remove and reinsert the USB cable into:
- A different USB port on the PC or POS terminal
- Directly into the machine (avoid hubs when testing)
- For Ethernet POS printers, check:
- The Ethernet cable clicks firmly in
- The link light on the network port is on or blinking
After reseating everything, turn the printer off and on again, then press FEED. If paper now advances, you’ve solved it.
Read the power and error lights
Your thermal POS printer is usually telling you what’s wrong:
Solid green power light, no error light
→ Hardware is OK. If paper still doesn’t move, suspect paper loading, jam, or dirty rollers.Flashing red or orange light
→ Often means cover open, no paper, or paper jam. Reseat the paper roll and close the cover firmly until it clicks.Constant red light and beeping
→ Serious error: jam at the cutter, sensor blocked, or internal fault. Stop forcing feed and plan to open and inspect the paper path.
When you understand these lights, you know where to look next and avoid random guessing.
Fast fixes when your POS printer is not feeding
If your POS printer is not feeding paper, run through these quick wins first. In most shops and restaurants, one of these fixes solves the problem in under 5 minutes.
1. Reload the paper roll the correct way (most common fix)
Most “POS printer not feeding” issues come from wrong paper loading.
- Open the cover and remove the roll completely.
- Make sure the paper feeds from the bottom of the roll toward you, not over the top.
- Pull 5–10 cm out, close the lid firmly until it clicks, then press FEED.
- If the roll is loose on the core or not seated in the side holders, the printer won’t grab it.
This is the first thing I tell store owners to check when a thermal POS receipt printer is not feeding paper after a change.
2. Clear hidden jams and tiny paper scraps
A small scrap near the cutter can fully block the paper path.
- Open the cover and follow the paper path from roll to exit.
- Gently pull out any torn paper pieces with two hands—never yank.
- Check around the auto-cutter for stuck labels, tape, or stickers.
If your receipt printer is not pulling paper at all, there’s a good chance it’s a mini jam you can’t see at first glance.
3. Clean the paper sensor and feed roller
Dust and paper powder make the printer think there’s “no paper” or reduce grip.
- Use a soft, dry cloth or alcohol wipe to clean the black rubber feed roller.
- Wipe the small paper sensor window near the paper entry—don’t scratch it.
- Let everything dry fully, then press FEED again.
A dirty sensor is a common cause of “receipt printer error paper not loading” even with a full roll.
4. Reset the printer to factory settings
If the mechanics are fine but the logic is confused, do a reset.
- Turn the printer off.
- Hold FEED, turn power back on, keep holding until lights flash or it prints a config page (depends on model).
- Release and let it finish.
This often clears weird “no paper feed” or “data” errors that started after a settings change or firmware update.
5. Check paper thickness and roll tension
Cheap or wrong paper can stop clean feeding.
- Make sure the roll matches your printer: 58 mm or 80 mm width, correct core size.
- If the roll is wound too tight, unroll a bit and rewind loosely.
- Paper that’s too thick or stiff can cause jams and motor strain.
For high-volume counters and cash register POS setups, I always recommend approved thermal paper only—random low‑grade rolls cause most feed and jam complaints.
6. Test with a different roll of thermal paper
If nothing above helps, assume the roll itself is bad.
- Try a known good roll from another working POS printer.
- Confirm it’s thermal paper (scratch it with a coin; it should turn black).
- If the new roll feeds normally, bin the old batch.
Many “thermal receipt printer blank paper” and “thermal printer paper not advancing” cases come down to poor or damaged paper, not the printer hardware.
These fast fixes handle the majority of POS thermal printer paper jam fixes and “no feed” issues in small retail, takeaway, and kiosk environments. If the printer still won’t move paper after these, you’re likely dealing with a cutter, motor, or sensor fault that needs deeper troubleshooting or service.
How to Reload POS Printer Paper the Right Way
If your POS printer is not feeding paper, there’s a good chance the paper roll is loaded wrong. Fixing this usually takes less than a minute if you follow the right steps.
Confirm You’re Using Real Thermal Paper (Scratch Test)
Most POS receipt printers (58mm and 80mm) are thermal. If you use non‑thermal paper, the printer won’t print anything even if it feeds.
Quick checks:
- Scratch test:
- Take a small piece of the roll.
- Rub your fingernail or a coin quickly across one side.
- If a dark line appears, it’s thermal paper and that’s the printing side.
- If nothing appears, you’re likely using non‑thermal or low‑quality paper that can cause “no feed” or blank receipts.
- For SDLPOS printers, I always recommend high‑quality, low-dust thermal rolls to protect the print head and feed roller.
Knowing the paper type and quality is just as important as knowing the core POS hardware components you’re running.
Step‑by‑Step Paper Loading for Thermal POS Printers
Use this process for most 58mm and 80mm thermal POS receipt printers (SDLPOS, Epson, Star, Bixolon, etc.):
- Turn the printer OFF or press FEED to stop any job.
- Open the paper cover using the latch or button.
- Remove the old roll and any loose scraps inside.
- Check the roll width:
- 58mm printers need 57–58mm rolls.
- 80mm printers need 79–80mm rolls.
Wrong width can stop the paper from feeding straight.
- Place the roll in the holder:
- The roll should sit flat, not tilted or squeezed.
- Pull 5–10 cm (2–3 inches) of paper over the cutter edge.
- Close the cover firmly until you feel or hear a click.
- Turn the printer back ON and press FEED once:
- The paper should advance smoothly and cut (if auto‑cutter is enabled).
If the paper doesn’t advance, reopen the cover and recheck orientation.
Correct Thermal Paper Roll Orientation So It Actually Feeds
Wrong orientation is the number one reason a thermal POS receipt printer is not feeding or prints blank receipts.
Use this simple rule:
- When the printer cover is open and the roll is in the holder:
- The paper should unroll from the bottom toward you in most front‑exit POS printers.
- If you pull the paper and it comes from the top of the roll, it’s likely upside down.
Confirm orientation with the scratch test:
- Scratch both sides of the paper:
- The side that turns dark must face the print head (usually facing down toward the mechanism).
- If it faces the wrong way, the printer will feed but print blank or very faint receipts.
Common Loading Mistakes That Stop Feeding
When a POS printer not feeding issue shows up right after a paper change, it’s usually one of these:
Upside‑down roll
- Paper prints blank.
- Feed may work, but you see no text or graphics.
- Fix: Flip the roll, scratch test again, reload.
Wrong width roll
- Roll too wide: paper rubs the sides, jams, or won’t drop into the holder.
- Roll too narrow: paper shifts sideways and gets stuck.
- Fix: Use the correct width listed on your printer or cash register system specs.
Roll too tight or core crushed
- A roll wound too tight or with a damaged core can’t spin freely.
- The printer’s feed roller slips and the paper doesn’t advance.
- Fix:
- Unwind a few loops by hand to loosen it.
- If the core is oval or crushed, replace the roll.
Paper not pulled past the cutter
- If the leading edge of the paper is still inside the printer when you close the cover, the feed roller can’t grab it.
- Fix: Always pull a strip of paper outside the cover before closing.
Cover not fully closed
- Many POS printers have a sensor in the cover.
- If it’s not fully locked, the printer shows “paper error” or won’t feed.
- Fix: Press the cover down evenly on both sides until it clicks.
Load the roll correctly, double-check orientation with the scratch test, and in most cases your POS printer paper not feeding issue is solved without any tools or downtime.
Clearing POS Printer Paper Jams and Hidden Blockages
When a POS printer is not feeding, a paper jam or hidden blockage is one of the most common causes. Here’s how I deal with it quickly and safely.
Signs Your POS Printer Has a Paper Jam
Your POS or thermal receipt printer is likely jammed if:
- The FEED button doesn’t move paper, or paper advances only a few millimeters.
- You hear whirring or grinding, but the paper stays still.
- The printer shows paper error / red light, even though a roll is loaded.
- Receipts come out crumpled, torn, or half‑printed.
- The cover feels hard to close or pops open during printing.
If you’re running busy retail or restaurant operations, these symptoms are your first clue the paper path is blocked.
How to Open the Cover and Inspect the Paper Path
Most thermal POS receipt printers open with a simple latch:
- Turn the printer off and unplug it for safety.
- Press or pull the top cover lever/latch to open the lid fully.
- Remove the paper roll and set it aside.
- Use a phone flashlight to check the whole paper path:
- From the roll holder
- Across the thermal print head
- Through the feed rollers
- Out past the auto cutter and exit slot
If you manage multiple outlets or high‑volume environments, make this inspection part of your regular POS hardware routine—just like you would when checking new POS hardware for high‑volume retail.
How to Safely Remove Stuck Paper
You want the paper out, but you don’t want to damage the printer:
- Do not use metal tools (screwdrivers, knives, scissors).
- Gently pull torn paper in the normal feed direction (forward, toward the exit).
- If the paper is wrapped around the roller, rotate the roller slowly by hand while pulling.
- Remove all tiny scraps, especially near sensors and the cutter area.
- Never yank paper backward through the thermal head; that can misalign parts.
Take your time—forcing it is how feed rollers and gears get damaged.
Removing Labels, Stickers, and Debris
A lot of “mystery” feed problems come from labels, tape, or sticker glue stuck inside:
- Check the cutter area and exit slot for:
- Price labels
- Delivery stickers
- Tape residue
- Curled paper scraps
- If you see residue:
- Turn the printer off and unplug it.
- Use a slightly damp cloth with isopropyl alcohol (70–90%) to wipe the cutter blade area and nearby plastic/metal parts.
- Avoid soaking; a light wipe is enough.
- Let everything dry completely before powering on.
Sticky build‑up is a major reason a thermal POS printer stops pulling paper or jams repeatedly.
When a Jam Means Cutter or Motor Problems
Sometimes the “jam” is actually a failing part:
- The printer beeps and flashes red, the cutter only moves halfway, and every feed attempt jams at the same spot → likely auto cutter issue.
- You hear a loud grinding or clicking and the paper doesn’t move at all, even with no jam → possible feed motor or gear failure.
- Paper feeds freely with the cover open or cutter disabled (if your model allows it), but jams every time it tries to cut → cutter misalignment or broken teeth.
If you see these signs repeatedly, you’re probably past quick fixes. In that case, I usually:
- Test with a fresh roll of known good thermal paper.
- Try a full power cycle and self‑test.
- If the issue stays, plan for cutter, motor, or board repair, or consider replacing the unit with a more robust POS printer that matches your throughput and local support options.
The goal is simple: clear blockages fast, avoid forcing mechanical parts, and recognize early when the problem is no longer “just a jam.”
Cleaning Sensors, Rollers, and Print Head on a POS Printer
If your POS printer is not feeding or the paper only advances sometimes, dirty sensors, rollers, or print head are usually the reason. A 3–5 minute clean-up often fixes “POS printer not feeding” issues without any parts or tools.
Why Dust and Paper Powder Stop the Paper Feed
Thermal POS receipt printers constantly shave tiny bits of paper off every roll. Add kitchen grease, fingerprints, and dust, and you get a sticky film that:
- Makes feed rollers slippery, so the printer can’t pull paper
- Blocks the paper sensor, so the printer thinks “no paper”
- Causes skewed feeding and crooked or half-printed receipts
- Triggers fake paper jams and “receipt printer not pulling paper” errors
If your POS thermal printer paper is not advancing, but you hear the motor trying, dirty rollers or sensors are very likely the cause.
Where the Paper Sensor Is on Most POS Printers
Most 58mm and 80mm thermal POS printers (SDLPOS, Epson, Star, Bixolon, etc.) place the main paper sensor:
- Just under the paper path, right before the print head
- Near the center or slightly off-center of the paper width
- In a small slot or hole where the paper sits when the cover is closed
You’ll usually see a tiny black plastic “eye” or lever. If that spot is buried in dust or paper flakes, your thermal POS receipt printer won’t feed or will show “paper out” even when the roll is full.
How to Clean POS Printer Sensors Safely
Use only light cleaning to avoid scratching sensors:
- Turn the printer off and unplug power and USB/Ethernet.
- Open the cover and remove the paper roll.
- Use a dry, soft brush or compressed air to remove loose dust.
- Lightly wipe the sensor area with:
- A lint-free cloth or cotton swab
- Damped with 90%+ isopropyl alcohol (not dripping)
- Let it dry fully (30–60 seconds) before closing the cover and powering back on.
Avoid soaking the sensor or using glass cleaner, water, or harsh chemicals. If you’re running multiple terminals or reselling POS hardware, baking in this kind of quick cleaning between shifts massively cuts down on “POS printer paper not feeding” tickets.
How to Clean Feed Rollers So They Grip Again
Dirty or glossy rollers = no grip = receipt printer not pulling paper. To clean the feed rollers:
- Keep the printer powered off and cool.
- Rotate the rubber roller by hand (or gently turn the gear if accessible).
- Wipe the full surface of the roller with:
- A lint-free cloth lightly moistened with isopropyl alcohol
- Focus on dark, shiny, or sticky spots – that’s where dust and grease live.
- Keep wiping and rotating until the roller feels slightly tacky, not slippery.
- Let it dry for 1–2 minutes before reloading the thermal paper roll.
If feed rollers are cracked or polished smooth from years of use, cleaning may help temporarily, but a roller replacement may be needed to fully fix intermittent paper feed problems.
Safe Cleaning for the Thermal Print Head
A dirty print head won’t usually stop the paper from feeding, but it can cause:
- Faded or blank receipts
- Missing lines
- Extra friction on the paper path
To clean the thermal print head correctly:
- Make sure the printer is off and cool (never clean a hot head).
- Open the cover and locate the thin metal strip/bar above the roller – that’s the print head.
- Use a thermal head cleaning pen, or:
- A lint-free cloth / foam swab with isopropyl alcohol
- Wipe gently in one direction along the head, not back and forth.
- Do not use anything sharp or abrasive (no screwdrivers, no metal tools, no rough cloth).
- Let it dry completely, then reload your roll with the correct thermal paper roll orientation so the coated side touches the head.
If you run high-volume retail or hospitality, adding a quick monthly cleaning routine for sensors, rollers, and the print head will prevent most “thermal printer paper not advancing” and “blank receipt” issues before they hit your checkout lines. For growing setups or resellers who need reliable gear, you can also look at POS hardware options that are built for heavy use and easy maintenance to reduce failure rates across sites.
Running a Self‑Test and Basic Diagnostics
When your POS printer is not feeding, a quick self‑test tells you if the hardware is okay or if you’re chasing the wrong problem.
How to run a POS printer self‑test with the FEED button
Most thermal POS receipt printers (58mm and 80mm) use a similar method:
- Turn the printer OFF.
- Press and hold the FEED button.
- While holding FEED, turn the printer ON.
- Keep holding until it starts printing a test page, then release.
If your model is different, check the manual or your brand’s support page. For stores rolling out multiple printers or sites, it’s worth adding this step into your regular POS hardware deployment plan.
What a successful self‑test tells you
If the self‑test prints correctly and the paper feeds smoothly:
- The motor, feed rollers, sensors, and print head are working.
- Your issue is likely software, drivers, settings, or cabling, not the printer’s mechanics.
- Paper feeding problems that only happen inside the POS app usually mean wrong paper size settings or driver issues.
If the test prints but your POS software won’t
If the self‑test is fine but your POS software won’t print or feed:
- Confirm the correct printer model is selected in your POS app.
- Check the port/connection type (USB, Ethernet, serial) matches how it’s plugged in.
- Reinstall or update the thermal printer driver.
- Try printing a Windows test page or a simple text file.
This is the classic “POS printer not feeding” case where the printer is healthy but the system configuration is wrong.
Using beeps and lights as error codes
Most POS printers use power lights, error lights, and beeps as error codes:
- Solid green + no beeps: normal.
- Blinking red / orange + beeps: paper jam, cover open, no paper, or sensor error.
- Repeated patterns (e.g., 3 beeps, pause, 3 beeps): hardware or cutter error, check your model’s code list.
Always note the light color + blink pattern + beeps before power cycling. It’s the fastest way for support to narrow down the fault.
When a failed self‑test means hardware trouble
If the printer won’t print a self‑test page at all, or:
- The paper won’t advance during self‑test,
- You hear grinding or weak motor sounds,
- The test only prints halfway or very faint,
then you’re likely facing a hardware problem: worn feed rollers, bad motor, faulty power supply, or main board damage. In that case, don’t keep forcing it—document the symptoms (photos/video of lights and sounds) and reach out to us so we can advise on repair vs. replacement and get you a compatible unit or parts the same day.
Checking Printer Settings, Drivers, and Connections
If your POS printer is not feeding, don’t ignore the “software side.” A wrong setting or bad cable can look exactly like a hardware fault.
Match Paper Width and Type in Your POS Software
If your POS app thinks you’re using the wrong paper size, the printer can stop, half‑feed, or cut in the wrong place.
Check in your POS / driver settings:
- Paper width: 58mm or 80mm – match exactly what’s in the printer.
- Paper type: Thermal, not “plain” or “dot matrix.”
- Margins and cutter options: Turn off any weird custom page sizes while testing.
If you’re still choosing a system, it’s worth looking at how different POS platforms handle receipt printers before you commit.
Check Printer Model and Port Selection
Your POS software might be sending data to the wrong device.
- In Windows > Printers & Scanners, confirm:
- The correct model name (e.g., “SDLPOS 80mm Thermal,” “Epson TM-T20”)
- The printer is Set as default (for simple setups)
- In your POS app settings:
- Select the exact model/brand if listed
- Choose the right port:
- USB: “USB Printing Support” or similar
- Network: IP address of the printer
- Serial: COM1 / COM2 (match your cable)
Update or Reinstall Printer Drivers
A bad or generic driver can cause “no feed” or blank receipts.
- Download the latest driver for your exact model and OS.
- Uninstall the old printer in Windows, then reinstall with the new driver.
- Avoid printing as a “Generic / Text Only” device while troubleshooting a feed problem.
Test USB, Ethernet, or Serial Cables and Ports
Sometimes “POS printer not feeding” is just “data never arrived.”
- USB printers:
- Try another USB port on the PC
- Try a shorter, known-good USB cable
- Avoid unpowered USB hubs
- Ethernet printers:
- Check for link lights on the printer’s LAN port
- Swap the Ethernet cable
- Plug into a different switch/router port
- Serial printers:
- Confirm the COM port number in Device Manager
- Match baud rate and settings with the printer manual
Network and IP Problems That Look Like Feed Issues
On network POS printers, “not feeding” often means “not getting the job.”
- Print the printer’s self-test / network config to see its IP.
- Make sure:
- IP in your POS app matches the printer’s IP
- The printer’s IP is set to static or reserved in the router
- No firewall is blocking the printer’s IP or port (often 9100)
If you’re running multiple terminals (Windows cash register, tablet POS, or hybrid), treat each device like a separate host and confirm each one can reach the printer over the network, similar to how you’d compare setups when choosing between a Windows cash register vs. tablet POS.
Calibrating the POS Printer for Clean Feeding
When you should calibrate your POS printer
Calibrate your POS printer any time the paper feed feels “off,” for example:
- Paper feeds crooked or receipts come out slanted
- The printer skips sections or feeds in short bursts
- You’ve just changed to a new paper brand, width, or thickness
- You’ve done a deep clean or reset and feeding changed afterward
Regular calibration is especially useful in busy retail or restaurant setups where printers run all day as part of a multi‑peripheral POS environment, similar to what we recommend when choosing POS hardware that works together smoothly.
Using the FEED button sequence to calibrate
Most thermal POS receipt printers use a FEED button combo to start calibration:
- Turn the printer off.
- Hold the FEED button, then turn the printer on.
- Keep holding until the printer beeps or prints a short config/calibration page.
- Release FEED and wait for the printer to finish feeding and stop on its own.
Check your model’s manual for the exact FEED sequence, but the logic is the same on most 58mm and 80mm POS thermal printers.
How calibration fixes misaligned or intermittent feeding
Calibration helps your POS printer:
- Re-detect the paper width and black marks/notches (if used)
- Sync sensors with the actual start/stop position of the paper
- Fix “start printing halfway down the receipt” or intermittent paper feed issues
- Reduce cases where the printer says “no paper” even though the roll is there
If your thermal POS printer paper is not advancing straight, recalibration often clears the problem in seconds.
Recalibrating after new paper rolls or cleaning
Any time you:
- Switch to a new thermal paper brand or different thickness
- Move from 58mm to 80mm rolls (or vice versa)
- Clean the sensors, rollers, or print head
…run a quick calibration afterward. This lets the paper sensor and feed roller “learn” the new paper feel and reduces future POS printer not feeding and receipt alignment issues.
Model-Specific POS Printer Fixes (How to Fix POS Printer Not Feeding)
Different POS printers fail in slightly different ways. When a POS printer is not feeding or your thermal POS receipt printer is not feeding paper, use these brand‑specific tips before you give up.
SDLPOS 58mm & 80mm POS Printers
For our own SDLPOS 58mm and 80mm thermal POS printers:
Common “no feed” issues
- Paper loaded upside down (blank receipts / no paper advance)
- Tiny paper jam right at the cutter
- Dirty paper sensor or worn feed roller
Basic button combos
- Self-test / hardware check:
- Turn printer OFF
- Hold FEED
- Turn ON while holding, release after 3–5 seconds
- Quick reset (varies by model, check label under the printer):
- Turn OFF, hold FEED, power ON, keep holding 10+ seconds until printing stops
If you’re upgrading hardware or adding lanes, we usually pair these printers with our POS hardware bundles with 24/7 technical support so you’re not debugging alone: POS hardware with always-on support.
Epson TM‑T20 / TM‑T82 Paper Feed Fix
For an Epson POS printer not feeding (TM‑T20, TM‑T82):
- Check the paper path first
- Open the top cover
- Remove the roll
- Blow or wipe out loose paper dust
- Clean the sensors
- Look near the paper entrance and cutter area for a small black “eye” – that’s the paper sensor
- Wipe gently with an alcohol wipe or dry lint‑free cloth
- Run a self-test
- Turn OFF
- Hold FEED
- Turn ON and keep holding until the printer starts printing
If the thermal printer self-test page feeds perfectly but your POS app won’t print, it’s a driver / port / software issue, not a feed motor problem.
Star TSP143 / TSP100 Auto-Cutter Jam
A Star TSP100 paper feed issue is often an auto-cutter jam:
- Signs
- Loud click or grind, then a red error light
- Paper stops right at the cutter, or only partly cut
- Fix the auto-cutter jam
- Turn printer OFF
- Open the cover
- Look at the metal cutter blade near the exit slot
- Remove tiny scraps, labels, or thick receipt tails stuck around the blade
- Reset the cutter
- Some models have a manual cutter reset slot on the side/front – gently move it with a flat tool as per manual
- Turn ON and press FEED to confirm smooth paper advance
If the cutter jams repeatedly, the cutter unit may be worn and needs replacement.
Bixolon SRP‑350 Roller Pressure & Tension
On a Bixolon SRP‑350 with a receipt printer not pulling paper or intermittent feeding:
- Check and clean the feed roller
- Open the cover and remove the roll
- Clean the black rubber roller with a slightly damp alcohol wipe
- Let it dry fully before loading paper
- Adjust roller pressure/tension (model-specific)
- Some SRP‑350 versions have a small lever or dial near the roller
- Set it to “standard” first; too low = slip, too high = jams
- Run a test feed
- Press and hold FEED with power ON
- Make sure the paper advances smoothly for a few seconds
Persistent slipping even after cleaning usually means the roller is worn and needs replacing.
Other Common Thermal POS Brands
For other brands (Citizen, Rongta, Xprinter, etc.) with POS receipt printer no paper feed:
- Check the label under the printer for exact model number
- Download the manual / quick guide from the brand’s official site
- Search: “Brand Model user manual” or “thermal printer self-test Model”
- Look for sections on:
- Self-test / FEED button functions
- Paper jam removal
- Sensor locations
- Factory reset / initialization
If you’re modernising your checkout and standardising hardware across stores, I usually recommend planning printer models together with your POS refresh so support and parts stay simple. You can see how we approach that in our guide on modernizing your retail checkout system: modern retail checkout and POS hardware planning.
Whenever a thermal POS printer paper jam fix or factory reset step in the manual doesn’t restore feeding, you’re likely looking at motor, cutter, or board failure and it’s time to weigh repair vs. replacement.
Advanced Fixes When Your POS Printer Still Won’t Feed
When your POS printer is still not feeding after basic troubleshooting, you’re likely dealing with a deeper hardware or setup issue. At this point, treat the printer like critical business hardware: test carefully, document what
Warning signs you should not ignore
When a POS printer is not feeding, some symptoms mean “stop and check” and others mean “stop and unplug.” These are the danger signs I never ignore.
Grinding or scratching noises when trying to feed
If your POS printer makes grinding, scratching, or loud clicking sounds during paper feed:
- Stop feeding immediately – don’t keep pressing the FEED button.
- Likely causes:
- Jammed paper in the cutter or gears
- Misaligned or worn feed rollers
- Broken gear or motor problem
- Forcing it can strip gears, break the cutter, or burn the motor. Open the cover, check for jams, and if the noise continues with no visible obstruction, it’s time for a technician.
Constant red light and beeping that won’t clear
A POS receipt printer that stays on a solid or flashing red light with constant beeps is telling you there’s a serious fault:
- Common meanings:
- Cover not fully closed
- Severe paper jam at the cutter
- Overheating head or motor
- Mechanical error (motor, cutter, board)
- If you’ve:
- Reloaded paper correctly
- Checked for jams
- Power-cycled the printer
And the error won’t clear, don’t keep resetting. Continuous beeping plus red light usually means a hardware fault that needs service.
Printer feeding but printing half or faded receipts
If the thermal POS printer feeds paper but prints:
- Half receipts, missing lines, or only part of the width
- Very light / faded text, even with good paper
Then:
- You might have:
- Failing thermal print head
- Wrong temperature/density setting in driver
- Poor-quality or incompatible thermal paper
- Power supply issues (under-voltage)
- Don’t just increase the darkness in settings and forget it. If a good self-test is also faint or incomplete, that’s a hardware warning. A dying head or weak PSU will get worse, not better.
Overheating, burning smells, or repeated shutdowns
If your POS thermal printer:
- Feels very hot around the head or motor area
- Gives off a burning smell (plastic, rubber, or electrical)
- Shuts down and reboots repeatedly under load
Then unplug it right away:
- Possible issues:
- Shorted board or motor
- Failing power adapter
- Blocked ventilation, causing overheating
- Running it in this state can kill the board completely or create a fire risk. Don’t “let it cool and try again” more than once; treat this as a critical fault.
When to stop trying fixes and call a technician
Stop DIY fixes and call a technician or your POS supplier when:
- Grinding or loud mechanical noise doesn’t stop after clearing visible paper
- The red error light and beeping persist after reload, jam check, and power cycle
- Self-test pages fail to print or look obviously wrong (missing half the page, random blocks)
- There’s a burning smell, visible smoke, or repeated power cut-outs
- Feed rollers spin but never grab paper, even with fresh rolls and cleaning
At that point, you’re likely looking at motor, cutter, roller, or main board issues. Those are parts I don’t recommend you open or replace yourself unless you’re trained or following the brand’s service manual.
If you’re planning a hardware refresh rather than a repair, it’s worth looking at cost‑effective POS hardware that still supports reliable receipt printers and replacement parts, as covered in our guide to cost‑effective POS hardware for wholesalers.
Preventing POS Printer Feeding Problems
If your POS printer is critical to your checkout flow, the best fix is prevention. Here’s how I keep POS printer feeding problems to an absolute minimum across busy retail and hospitality setups.
Use high‑quality SDLPOS‑approved thermal paper
Poor paper is the #1 cause of a thermal POS receipt printer not feeding paper, jamming, or printing faint receipts.
- Always use SDLPOS‑approved thermal paper rolls (correct width and core size for 58mm or 80mm printers).
- Cheap rolls shed more dust, curl badly, and can slip on the feed roller.
- Match the roll specs to your printer: width, diameter, and paper thickness (GSM).
For multi‑lane or chain environments, I usually align printer and paper standards with our broader POS hardware recommendations for busy retailers so operators aren’t guessing what to buy.
Store paper correctly to protect feed and print quality
How you store thermal rolls directly affects paper feed, curl, and print contrast.
- Keep rolls in a cool, dry place, away from direct sunlight and heat sources.
- Avoid humid storerooms; moisture causes sticking, swelling, and feed resistance.
- Don’t stack heavy boxes on top of rolls – crushed cores lead to receipt printer not pulling paper smoothly.
- Rotate stock (first in, first out) so old paper isn’t drying out or fading before use.
Simple cleaning schedule for sensors and rollers
A quick routine keeps sensors and feed rollers from getting clogged with dust and paper powder.
- Weekly (busy sites) / Monthly (low volume):
- Open the cover, blow or gently brush out loose dust.
- Wipe the feed rollers with a slightly damp, lint‑free cloth or alcohol wipe (let dry fully).
- Lightly clean the paper sensor area so it can detect the paper edge properly.
- Log this as part of your regular POS maintenance so it actually gets done.
Best habits when loading and closing the cover
Most “POS printer not feeding after paper change” calls come down to loading habits.
Train staff to always:
- Check correct thermal paper roll orientation (shiny/thermal side facing the print head).
- Pull 5–10 cm of paper out before closing the cover so the printer can grip the edge.
- Make sure the roll spins freely – not wedged too tight in the holder.
- Close the cover firmly until it clicks; half‑closed covers cause “no paper feed” and cutter errors.
Monthly self-tests and quick visual checks
A 1‑minute monthly check can catch problems before they hit peak trading.
- Run a thermal printer self‑test page using the FEED button (varies by model):
- Confirms feed, print head, and sensors are working.
- Quick visual check:
- Look for curled, crushed, or damp paper rolls.
- Check for dust buildup around the paper path and cutter.
- Confirm there are no error lights before trading starts.
If you’re running high‑volume sites like pharmacies, supermarkets, or fast-service concepts, pairing this routine with solid POS hardware planning for multi‑site operations (as in many of our retail chain POS deployments) keeps receipt printer feed issues rare and predictable.
Getting Help from SDLPOS
If your POS printer is still not feeding, I’d rather you send us a quick message than lose a whole shift fighting with it.
How to get fast remote help (photos & videos)
For POS printer not feeding or receipt printer not pulling paper, send us:
- 2–3 clear photos:
- Front of the printer (showing lights and buttons)
- Inside with the cover open (paper path, rollers, sensors)
- The paper roll you’re using (label visible if possible)
- A short 10–20 second video:
- Press the FEED button so we can hear/see what the printer does
- Capture any error lights or grinding noises
This lets us spot typical thermal POS receipt printer not feeding paper issues in minutes instead of guessing.
What details to send so we can diagnose faster
Paste this info in your message so we can jump straight to the right fix:
- Printer brand + model (e.g. SDLPOS 80mm, Epson TM‑T20, Star TSP100)
- Connection type: USB / Ethernet / Serial / Bluetooth
- POS software or platform you’re using
- Exact issue:
- “No feed at all” / “feeds but blank receipts” / “feeds then paper jam”
- What you’ve already tried:
- reloaded thermal paper, cleared jam, ran self-test, changed cable, etc.
For USB models, you can also follow our POS USB printer troubleshooting guide while you wait for a reply.
Same-day replacement parts and compatible printers
As a cash register POS supplier, we keep the common failure parts ready to ship:
- Feed rollers and cutter units for 58mm and 80mm SDLPOS printers
- Power adapters, cables, and replacement mainboards on request
- Drop‑in compatible thermal POS printers if yours is truly dead
In many regions we can dispatch same-day replacements, so your retail or hospitality POS system doesn’t stay down overnight.
Where to order genuine SDLPOS rolls, rollers, and sensors
To avoid repeat POS receipt printer no paper feed problems, use parts that match our printers:
- Genuine SDLPOS thermal paper rolls (correct width, thickness, and core size)
- Original sensors and rollers designed for SDLPOS feed pressure
- Bulk packs for chains and high‑volume stores
You can source all SDLPOS-approved thermal paper, rollers, and sensors directly from our sales team or bundled with new POS hardware for omnichannel retailers through our POS hardware solutions.


