


Scanner Driver Installation Guide 2026 for Windows 10 and 11
Before You Start: Choose the Right Connection Type
Getting your SDLPOS scanner up and running starts with picking the right connection type. Most scanners connect via USB or Serial RS232. Each has different setup steps, so knowing which one applies to you saves time and hassle.
USB: HID vs Virtual COM Mode
SDLPOS scanners can work in two main USB modes:
| Mode | Description | Driver Needed? | Best For |
|---|---|---|---|
| HID (Human Interface Device) | Acts like a keyboard, plug-and-play | No | Most users, easiest setup |
| Virtual COM / CDC | Creates a virtual serial port on USB | Sometimes yes | Advanced setups, legacy software |
Quick tip: If your SDLPOS model defaults to HID mode, Windows will usually recognize it instantly without needing drivers. Virtual COM mode may require manual driver install or configuration.
Serial RS232 Connection
Some SDLPOS scanners use traditional serial ports (RS232). This often means you’ll need:
- A serial-to-USB adapter if your PC has no serial port
- Manual driver installation for the adapter
- COM port and communication settings configured manually
We’ll cover these steps in detail later.
How to Identify Your SDLPOS Scanner Model and Mode
Check your scanner’s label or manual for the model number. On some models, you can scan a special “mode barcode” to switch between HID and Virtual COM modes.
If unsure, try plugging the scanner into USB first:
- If it types barcodes anywhere (e.g., Notepad), it’s in HID mode.
- If nothing happens, or you see an unknown device in Device Manager, it might be Virtual COM or RS232.
Quick Checklist Before You Start
Make sure you have:
- Windows Version: Windows 10 (22H2) or Windows 11 (24H2) recommended for best compatibility
- Admin Rights: Needed for driver installations and device settings
- Internet Access: For downloading drivers and updates if manual installation is required
Having everything ready upfront makes installation painless and fast. Next, we’ll walk through installing your scanner based on your connection type.
Method 1: Plug-and-Play USB Scanner (Most Common & Easiest)
Installing a USB scanner the easy way usually means using the Plug-and-Play feature that most Windows versions support these days. Here’s how to handle the two main USB connection modes your SDLPOS scanner might use: HID (Human Interface Device) and Virtual COM (CDC).
USB HID Mode (No Driver Needed)
- Connect your SDLPOS scanner to an available USB port.
- Windows will instantly recognize it as a keyboard input device and won’t require any drivers.
- To test, open Notepad and scan a barcode. The data should appear immediately.
- This mode is ideal for quick setup since it works out-of-the-box and is compatible with most POS systems.
USB Virtual COM / CDC Mode
Some SDLPOS scanners default to Virtual COM port mode, making them act like serial devices over USB. This lets POS software communicate with the scanner directly, but it usually needs a driver for the virtual COM port.
- Plug in the scanner and wait a moment.
- Windows might auto-install the generic CDC driver. If it doesn’t, you’ll need to download the SDLPOS Virtual COM driver manually from the official site.
- Once installed, check “Device Manager” for a new COM port entry assigned to your scanner.
- Configure your POS software to use the correct COM port and baud rate (normally 9600 baud for SDLPOS).
When Windows Auto-Installs vs When You Need Manual Driver
- Windows 10 and 11 will generally auto-install a basic USB HID or CDC driver for SDLPOS scanners.
- If you see a yellow warning icon in Device Manager or the scanner doesn’t work properly, manual driver installation is necessary.
- Manual installs are common if you’re working with older Windows versions or when using Virtual COM mode.
- For USB scanner not recognized POS issues, double-check your connection, try another USB port, or manually update the driver via SDLPOS downloads.
If you want the smoothest setup, starting with USB HID mode is your best bet. For POS setups requiring direct serial communication, Virtual COM mode with proper driver install is the way to go.
For deeper insights into reliable POS hardware setup, including scanner compatibility, you might find our guide on commercial-grade POS solutions helpful.
Method 2: Serial RS232 Scanner Installation
If your SDLPOS scanner uses the Serial RS232 connection, the installation process is a bit different but straightforward when you follow these steps.
Step 1: Install Serial-to-USB Adapter Drivers
Most modern PCs lack native serial ports, so you’ll likely need a serial-to-USB adapter. Before connecting your scanner:
- Plug in the adapter first.
- Windows may auto-install drivers, but if not, download the latest drivers from the adapter manufacturer’s website.
- Ensure the driver matches your Windows version (Windows 10, Windows 11).
Without the correct adapter driver, your scanner won’t communicate properly.
Step 2: Configure COM Port in Device Manager
Once the adapter is installed and connected:
- Open Device Manager (press Windows + X, then select Device Manager).
- Expand the Ports (COM & LPT) section.
- Find the serial-to-USB adapter (it usually shows as “USB Serial Port (COMx)”).
- Right-click it and select Properties.
- Under the Port Settings tab, check the COM port number (like COM3, COM4). You can change this if needed to avoid conflicts with other devices.
Remember this COM port number; you’ll need it when setting up your POS software.
Step 3: Set Baud Rate and Data Format
Most SDLPOS barcode scanners use these default serial settings:
| Setting | Value |
|---|---|
| Baud Rate | 9600 |
| Data Bits | 8 |
| Parity | None |
| Stop Bits | 1 |
| Flow Control | None |
To adjust these:
- In Device Manager, under Port Settings, modify these values to match the table.
- Save and exit.
Using the correct baud rate and data format ensures smooth communication between your scanner and POS system.
Troubleshooting Tip
If your scanner isn’t responding after installation, double-check the COM port number and serial settings. Some POS software allows you to select the COM port manually—make sure it matches what Device Manager shows.
For detailed tips on Windows scanner compatibility and POS software setup, check out our guide on Windows cash register solutions.
Official SDLPOS Scanner Driver Download & Installation
For a smooth setup, always get the latest official SDLPOS scanner driver from our trusted source. The 2026 versions come with key improvements for Windows 11 and earlier, ensuring compatibility and reducing driver conflicts.
Where to Download the Latest Drivers
You can download the authentic SDLPOS scanner drivers directly from the SDLPOS website. Avoid third-party sites to prevent potential malware or outdated files. Here’s the direct link to the official driver downloads for your SDLPOS barcode scanner:
Verify Driver Authenticity with Checksums
To ensure you have a genuine driver file, verify the checksum after download. This confirms the file wasn’t corrupted or tampered with:
- After downloading, use a checksum tool (such as fciv on Windows or online hash checkers).
- Compare the calculated SHA256 or MD5 checksum against the value posted on the SDLPOS driver page.
- If they don’t match, do not install the driver—redownload the file or contact SDLPOS support.
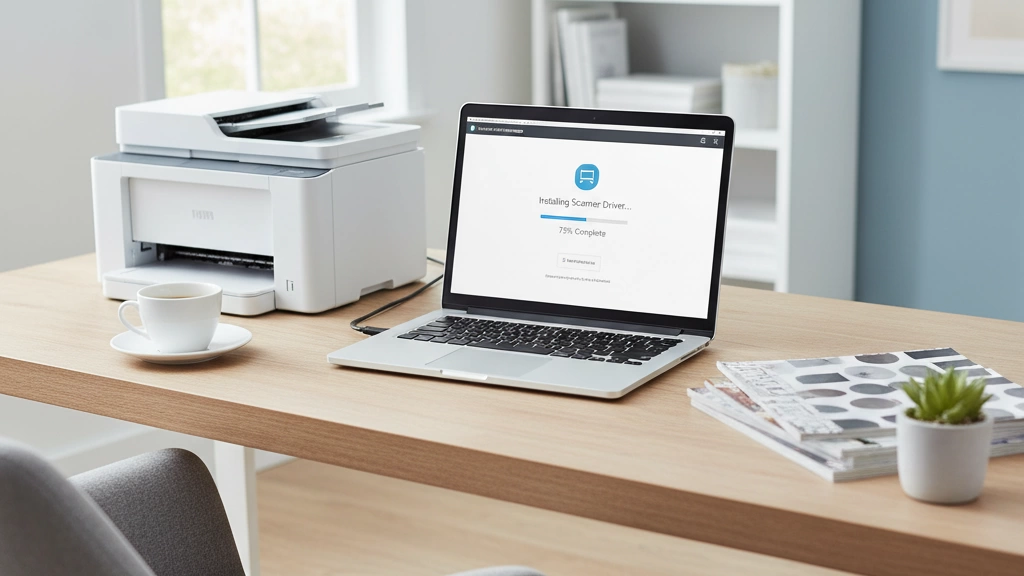
Step-by-Step Installation Walkthrough
Follow this quick guide to install your SDLPOS scanner driver correctly:
- Unplug your scanner before starting.
- Run the downloaded installer as Administrator (right-click > Run as administrator).
- Follow the on-screen prompts; the installer will detect your scanner model automatically.
- Once installation completes, reconnect the scanner to your PC.
- Wait for Windows to recognize the device – you may see a notification that the driver is ready.
- To confirm, open Device Manager and check under “Universal Serial Bus controllers” or “Ports (COM & LPT)” depending on your scanner mode.
- If driver installation prompts a reboot, restart your computer to finalize the setup.
We recommend checking our detailed guide with screenshots on the SDLPOS site for visual assistance during installation.
For related equipment, see our resources on buying POS hardware with financing options to get your POS setup fully equipped.
By downloading and installing the official SDLPOS scanner driver, you’ll ensure your barcode scanner works flawlessly with your cash register and POS software, avoiding typical driver conflicts or recognition issues.
Solving the Top 7 Driver Conflicts & Errors
Even after installing your SDLPOS scanner driver, you might face some common issues. Here’s how to quickly fix the top seven problems we see:
1. Scanner Beeps but Nothing Shows in POS Software
This usually means the scanner is working but your POS software isn’t receiving data. Check if the scanner suffix (Enter, Tab, or Carriage Return) matches the POS settings. Also, test the scanner in Notepad—if it works there, the issue is with the POS config, not the driver.
2. “Device Driver Was Not Successfully Installed”
If Windows fails to install the driver automatically, try running the installer as an administrator. Disable any antivirus temporarily that might block the driver. Also, download the latest official SDLPOS scanner driver from our site to avoid corrupted files.
3. Code 28 / Code 39 Errors in Device Manager
These errors indicate missing or corrupted drivers. Right-click the scanner device in Device Manager, choose “Update driver,” and point to the official SDLPOS driver folder. If that fails, uninstall the device completely, unplug the scanner, and reboot before reinstalling.
4. Conflict with Existing POS Printer or Scale Drivers
Driver conflicts are common when multiple USB POS devices share virtual COM ports or HID modes. Try changing the COM port number in Device Manager to a free slot and restart the POS software. Make sure no printer or scale software is forcing a reserved port.
5. Scanner Types Wrong Barcode Format (UPC vs Code128)
Some SDLPOS models default to UPC, causing issues with POS systems expecting Code128 or other barcode types. Use the scanner’s configuration manual or software tool to switch barcode modes to match your retail software expectations.
6. Driver Blocked by Windows SmartScreen or Antivirus
Windows SmartScreen or third-party antivirus may block unsigned or unfamiliar drivers. When prompted, select “Run anyway” or whitelist the driver in your security suite. Download drivers only from the official SDLPOS source to avoid these blocks.
7. Scanner Works in Notepad but Not in Your POS Software
This issue usually means the POS system’s input focus or scanner interface isn’t set up correctly. Verify your POS software’s scanner settings and try toggling the USB mode (HID vs Virtual COM). Refer to compatibility info for your POS software on supported SDLPOS drivers.
If you run into any of these problems, taking these steps should get your barcode scanner back on track and fully integrated with your POS system. For more support on avoiding hardware conflicts, check our insights on POS hardware innovations for seamless international transactions.
Testing Your Scanner After Installation
Once your SDLPOS scanner driver is installed, it’s crucial to make sure everything’s working perfectly before hitting the sales floor. Testing confirms that the scanner sends the correct data and suffix settings (like Enter, Tab, or Carriage Return) match your POS software expectations.
Best Free Testing Tools (2026)
- Notepad/Text Editor: The easiest way to test your scanner is by opening Notepad (or any simple text editor) and scanning barcodes. This lets you confirm if the scanner reads data accurately.
- SDLPOS Scanner Test Utility: Check if there’s a free downloadable scanner test tool from the SDLPOS website. These tools often give detailed info on barcode read quality and suffix settings.
- Online Barcode Generator+Reader: Use free online barcode scanners and generators for testing formats and verifying data integrity.
Confirming Suffix Settings (Enter / Tab / CR)
- After scanning a barcode in your test tool, watch how the cursor behaves:
- Enter (CR): Moves to the next line.
- Tab: Moves the cursor to the next field in your form.
- None: Just inputs data without moving the cursor.
- If your POS software expects an Enter after each scan but the scanner sends Tab, your product lookup won’t work. Adjust suffix settings in scanner programming or driver setup.
Real Retail Test: Scan 10 Different Products Without Error
- Grab 10 different products with various barcode types (UPC, Code128, EAN).
- Scan each product directly into your POS software.
- Check for any missed digits, wrong formats, or delays.
- If errors pop up, revisit driver settings or barcode modes.
- This practical test catches issues that simple text tests may miss.
Testing your scanner thoroughly saves time later and avoids checkout delays. If you want to learn more about up-to-date POS hardware options, check out our guide to POS terminal accessories.
Backup & Rollback: Never Lose a Working Configuration
Keeping a backup of your scanner driver settings is a smart move. Once you’ve got your SDLPOS scanner working perfectly, export the driver settings to a safe location. This way, if anything goes wrong, you can quickly restore your setup without starting from scratch.
Before making any big system changes, like driver updates or Windows upgrades, create a system restore point. It acts like a safety net to roll back your PC to a previous state if the scanner stops working after an update.
If a Windows update breaks your scanner, try these steps:
- Use the system restore point to revert to a working configuration.
- Roll back the scanner driver in Device Manager under the driver tab.
- Download and reinstall the latest official SDLPOS scanner driver from our site.
- Check for known compatibility issues with updated Windows versions.
Staying prepared with backup and rollback options prevents downtime and keeps your POS running smoothly.
For more on troubleshooting and installation basics, see our guide on POS USB printer troubleshooting.
Compatibility Matrix: SDLPOS Scanners vs Windows & Common POS Software
Making sure your SDLPOS scanner works smoothly with your operating system and POS software is crucial. Our scanners have been thoroughly tested on the most popular Windows versions, including Windows 10 22H2 and Windows 11 24H2, ensuring reliable performance without unexpected hiccups.
Tested Windows Compatibility
- Windows 10 22H2: Full driver support with HID and Virtual COM modes. No major issues reported when using the latest official SDLPOS drivers.
- Windows 11 24H2: Optimized for modern security and driver handling. Compatible with most SDLPOS models; occasional driver permission settings may require adjustment.
Compatible POS Software
Our SDLPOS scanners are designed to integrate perfectly with our own SDLPOS system as well as other widely-used POS platforms. This includes software that supports OPOS or direct USB scanner input, providing flexibility whether you run retail, hospitality, or other point-of-sale operations.
- Supports major POS brands that allow USB HID or Virtual COM data input
- Works well with customized POS setups thanks to configurable suffix and prefix options
- Compatible with cashier systems that recognize serial RS232 barcode scanners via USB adapters
If you’re looking for trusted POS hardware and want assurance about your scanner’s wide compatibility, check out our detailed insights on trusted POS hardware suppliers for resellers.
Choosing SDLPOS scanners means getting hardware tested for current Windows editions and compatible with a broad range of POS software, ensuring your cash register setup is future-proof and reliable.


