


Wall Mount POS Terminal Guide for Durable Aluminum Alloy Systems
Why Choose Wall-Mount POS Configurations?
As a manufacturer of industrial-grade hardware, we see a massive shift toward vertical installations. Moving your Point of Sale system off the counter isn’t just an aesthetic choice; it is a strategic operational decision. Here is why we recommend wall-mount configurations for modern businesses.
Space-Saving Retail Technology for Tight Counters
Real estate at the checkout counter is premium territory. Bulky stands and bases consume valuable surface area that could be used for impulse purchase displays or simply to create a cleaner, more welcoming customer interaction zone. By utilizing space-saving retail technology, we allow businesses to reclaim that counter space. Our all-in-one touch POS systems feature ultra-slim profiles and standard VESA compatibility, meaning the hardware sits flush against the wall, leaving the countertop completely clear for merchandise or food service.
Ergonomics & Flexibility for Staff Comfort
Employee fatigue directly impacts service speed and accuracy. A fixed desktop terminal often forces tall staff to hunch or short staff to reach awkwardly. Wall-mounting allows for the installation of the terminal at the optimal ergonomic screen height. Whether using a fixed bracket or an articulating arm, positioning the screen at eye level reduces neck strain and improves interaction speed. Our displays, ranging from 15″ to 21.5″, offer wide viewing angles that maintain visibility even when mounted higher up.
Spill Protection & Theft Deterrence
In hospitality environments, the counter is a danger zone for electronics. Spilled drinks and food debris can wreak havoc on standard desktop units. Mounting the terminal on the wall physically separates the hardware from the “splash zone.” Furthermore, our industrial-grade POS terminals feature waterproof and dustproof front panels, adding a second layer of defense. From a security standpoint, a VESA-mounted unit bolted to a stud or concrete wall is significantly harder to steal or tamper with than a freestanding tablet or monitor.
Creating a Modern Wire-Free Aesthetic
Nothing ruins a professional atmosphere faster than a tangle of power and data cables. Wall-mount setups force a disciplined approach to cable management solutions. By routing cables through the wall or using streamlined conduit channels, you achieve a sleek, “floating” screen appearance. Our terminals are designed with strategic I/O port placement to facilitate clean cable routing, ensuring the focus remains on your brand, not your wiring.
Comparison: Desktop vs. Wall-Mount POS
| Feature | Desktop POS Stand | Wall-Mount Configuration |
|---|---|---|
| Footprint | Consumes 10-15% of counter space | Zero counter footprint |
| Cable Visibility | Often exposed on the counter | Easily hidden behind the unit/wall |
| Spill Risk | High (Direct contact with surface) | Low (Elevated away from spills) |
| Adjustability | Limited to stand height | Customizable installation height |
| Stability | Can be knocked over | Securely bolted to structure |
Critical Hardware Specs for Wall Mounting
Thermal Dynamics: Why Aluminum Alloy POS Housing Matters
When you mount a terminal flush against a wall, you restrict airflow around the back of the unit. This makes material selection vital. We manufacture our units using aluminum alloy POS housing because it acts as a highly efficient heat sink. Unlike plastic casings that trap heat, aluminum draws thermal energy away from the processor and dissipates it into the environment. This keeps the internal components of your Wall-Mount POS terminal cool, even without the airflow typically found on a countertop stand.
Fanless Heat Dissipation in Vertical Setups
Moving parts are often the first thing to fail in commercial hardware. In a vertical wall-mount configuration, we strongly recommend fanless heat dissipation systems. By utilizing processors like the Intel Celeron J1900 or J4125, we eliminate the need for cooling fans. This reduces noise and prevents dust and grease from being sucked into the chassis—a critical feature for maintaining reliable restaurant POS hardware in hot or messy kitchen environments.
PCAP Touch Durability vs. Resistive Screens
Stability is key when a device is hanging on a wall. Old-school resistive screens require physical pressure to register a click, which can cause wall-mounted brackets to wobble or loosen over time. We use capacitive touch (PCAP) technology, which registers input with the lightest contact, similar to a smartphone. This 10-point multi-touch capability ensures that staff can operate the terminal quickly without applying force that stresses the mounting hardware.
Zero-Bezel Touch Screen Advantages
A zero-bezel touch screen offers more than just a sleek, modern look; it is a functional necessity for wall installations. The “true-flat” design eliminates the plastic frame edge where dust, moisture, and debris usually accumulate. This makes the screen incredibly easy to wipe down and sanitize, ensuring your POS hardware for small business remains professional and clean, whether it is installed in a retail boutique or a busy warehouse.
Port Accessibility & Cable Management Solutions
Gravity works against connections in vertical setups. If cables hang loosely, they can pull on the ports and cause intermittent failures. Our industrial-grade POS terminal designs feature recessed I/O panels and strategic port placement (USB, LAN, COM) to facilitate clean cable management solutions. This allows you to route power and data lines securely behind the VESA mount, preventing accidental disconnections and maintaining a wire-free aesthetic.
Understanding VESA Standards & Mount Types
Decoding VESA Mount Standard (75mm/100mm)
When we manufacture our POS terminals, we adhere strictly to the global VESA mount standard to ensure compatibility with universal mounting hardware. On the back of our aluminum alloy units, you will find a square pattern of four mounting holes. For most 15-inch to 21.5-inch touch screens, we utilize either VESA 75 (75mm x 75mm) or VESA 100 (100mm x 100mm) configurations. Before purchasing any wall hardware, verifying that the bracket matches the specific hole pattern on the terminal chassis is essential for a secure installation.
Low-Profile Wall Brackets vs. Tilting Mounts
Selecting the right bracket depends on how the terminal will be used.
- Low-Profile Wall Bracket: This mounts the terminal almost flush against the wall. It is the best choice for tight spaces or aesthetic-focused retail environments where you want the hardware to blend in.
- Tilting Mounts: These allow vertical adjustment of the screen angle. If your counter height varies or if overhead lighting causes glare on the glass surface, a tilting mount helps staff adjust the display for better visibility and comfort.
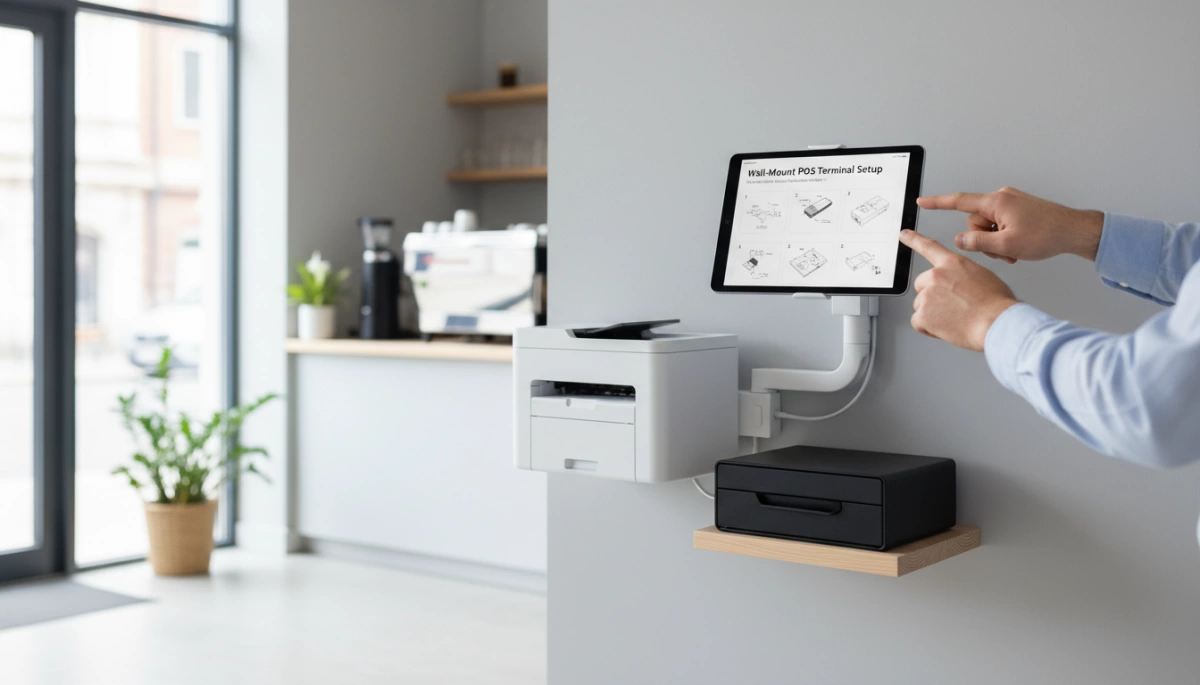
Articulating Monitor Arms for Customer Interaction
For setups requiring maximum flexibility, an articulating monitor arm is superior to fixed wall plates. These arms allow the POS terminal to extend, swivel, and rotate. This is particularly useful in service counters where the screen needs to be shared with the customer for signature capture or order verification. The arm allows the unit to be pushed back against the wall when not in use, keeping the workspace clear.
Heavy-Duty Mounting Interfaces for Industrial Use
In environments like commercial kitchens or manufacturing floors, standard consumer mounts often fail under constant use. We recommend pairing our industrial terminals with a heavy-duty mounting interface designed to support the weight of a solid metal chassis without sagging. When installing commercial-grade POS systems in high-traffic areas, rigid steel mounts prevent the screen from shaking during touch inputs, ensuring accuracy and protecting the hardware from accidental impact.
Installation Guide: Getting It Right
Installing a wall-mounted system requires more planning than simply placing a stand on a counter. Since our terminals utilize a durable aluminum alloy POS housing, they are robust but require a stable foundation to ensure safety and longevity. Proper installation prevents hardware damage and maximizes staff efficiency.
Surface Evaluation: Drywall, Concrete, and Studs
Before drilling, you must verify the structural integrity of the wall. Industrial-grade POS terminals carry more weight than standard consumer tablets due to their heavy-duty metal construction and heat dissipation components.
- Drywall: Never mount directly into drywall without anchors. Locate the wooden or metal studs for a secure hold.
- Concrete/Brick: Use masonry anchors to prevent the bracket from pulling loose over time.
- Backing Board: In older buildings with uneven surfaces, installing a plywood backing board first provides a flat, secure surface for the VESA mount.
Finding the Ergonomic Screen Height
Placement is critical for user comfort and speed. Mounting the screen too high causes shoulder strain, while mounting it too low forces users to hunch.
- Standard Height: The center of the screen should generally be at eye level for the average user, roughly 60-65 inches from the floor.
- Touch Interaction: For touch-heavy workflows, lower the height slightly so the arm rests at a natural 90-degree angle during use.
- ADA Compliance: If the terminal is customer-facing, ensure the ergonomic screen height meets local accessibility standards for wheelchair users.
Managing Power and Data Cables
A clean install relies on effective cable management solutions. Dangling wires are not only unsightly but also pose a safety hazard in busy kitchens or retail lanes.
- Route Through Wall: If possible, run power and LAN cables behind the wall for a completely wire-free look.
- Conduit Channels: For concrete walls, use surface-mounted raceways to hide cables neatly.
- Port Access: Our terminals feature strategic I/O port placement (USB, COM, LAN) to facilitate easy routing away from the VESA plate.
Securing the Industrial-Grade POS Terminal
Once the bracket is fixed, attaching the unit is the final step. Ensure you are using the correct screws for the VESA mount standard (typically M4 screws for 75mm or 100mm patterns). Tighten the screws firmly to handle the vibration of constant touch inputs. When planning your POS hardware deployment, always double-check that the mount is rated for the specific weight of the terminal to prevent sagging or accidental detachment.
Industry-Specific Use Cases
Wall-mounting isn’t just a stylistic choice; for many sectors, it is an operational necessity. Different environments demand specific configurations to maximize efficiency and hardware longevity. Here is how we see our wall-mountable terminals deployed across various industries.
Kitchen Display System (KDS) Hardware
In commercial kitchens, counter space is for food prep, not electronics. Mounting the terminal on the wall or a shelf pole is standard practice for a Kitchen Display System (KDS). The environment here is harsh—heat, steam, and grease are constant threats.
- Heat Management: Our aluminum alloy POS housing is critical here. It dissipates heat efficiently without relying on internal fans, which would otherwise suck in flour and grease, leading to component failure.
- Protection: The waterproof and dustproof front panel ensures that splashes or sticky fingers don’t compromise the system.
Compact Self-Service Kiosks
Not every business has the floor space for a freestanding kiosk. By using a VESA-compatible wall mount, you can transform a standard 15.6″ or 21.5″ touch terminal into a compact self-service kiosk. This is ideal for fast-casual dining or ticketing areas. It removes the footprint entirely while keeping the screen at a comfortable height for customer interaction.
Counter-Free Checkout for Boutiques
Modern retail design often favors minimalism. A counter-free checkout eliminates the barrier between staff and customers. By mounting the terminal on a swivel arm behind a small podium or directly on a wall, boutiques create a cleaner, more open shopping experience. Understanding the shift in hardware form factors is essential, and looking at the various types of cash registers available today highlights why modular, wall-mounted setups are becoming a preferred alternative to bulky legacy systems.
Warehouse and Industrial Management
In logistics centers and manufacturing floors, equipment needs to stay out of the way of forklifts and foot traffic. An industrial-grade POS terminal mounted to a structural column or rack serves as a reliable checkpoint for inventory management.
- Stability: We recommend heavy-duty mounts that can withstand vibration.
- Durability: The fanless design prevents metallic dust and debris from entering the casing, ensuring reliable operation in dirty environments.
Maintenance & Safety for Wall Units
Keeping a Wall-Mount POS terminal operational requires a slightly different approach than maintaining a countertop unit. Since these devices are fixed vertically, often in high-traffic zones, regular upkeep ensures longevity and safety for both your staff and the hardware.
Cleaning Fixed Zero-Bezel Screens
One of the biggest advantages of our hardware is the Zero-bezel touch screen design. Without the plastic frame found on older monitors, debris and grease have nowhere to hide.
- Wipe Down: Use a microfiber cloth to clean the true-flat surface. Because the front panel is water-resistant, you can wipe it down quickly without worrying about liquid seeping into the bezel.
- Touch Sensitivity: Regular cleaning prevents “ghost touches” caused by oil buildup.
- Lock the Screen: Always disable touch input before cleaning to avoid accidental transactions.
For more details on maintaining specific hardware configurations, you can check our common technical questions.
Routine Stability and VESA Screw Checks
Gravity is constant, and the vibration from thousands of daily touches can eventually loosen hardware. A Wall-Mount POS terminal relies entirely on the integrity of its mounting interface.
- Quarterly Inspection: Check the four screws connecting the terminal to the VESA mount standard bracket (75mm or 100mm). Ensure they are tight.
- Wall Anchors: Verify that the bracket itself hasn’t pulled away from the drywall or stud.
- Cable Strain: Ensure power and data cables have enough slack so they aren’t pulling on the ports or the mount itself.
Preventing Screen Droop Over Time
If you utilize an articulating monitor arm rather than a fixed flush mount, the weight of the aluminum alloy POS housing can sometimes cause the arm to sag or “droop” after months of use.
- Adjust Tension: Locate the tension bolt on the arm’s hinge. Tighten it until the screen holds its position firmly but can still be moved with intentional force.
- Check Weight Ratings: Ensure your mount is rated for the specific weight of the industrial terminal, not just a standard lightweight consumer monitor.
Wall-Mount POS FAQs
Can any POS terminal be wall-mounted?
Not every terminal is built for vertical installation. To mount a unit securely, the hardware must feature a VESA mount standard interface on the back panel. Our industrial-grade POS terminals are designed with pre-drilled VESA holes (typically 75x75mm or 100x100mm), allowing them to attach seamlessly to standard wall brackets or articulating arms. Attempting to mount a desktop-only unit without these specifications can compromise stability and void warranties.
Do wall-mounted units overheat easily?
Heat management is a valid concern when a device is flush against a wall, as airflow is restricted compared to an open counter. This is why we manufacture our terminals with aluminum alloy POS housing. Unlike plastic casings that trap heat, our aluminum alloy body acts as a large heat sink, efficiently pulling thermal energy away from the processor. Combined with fanless heat dissipation technology, our units maintain optimal operating temperatures even in tight, vertical spaces without relying on noisy cooling fans that can clog with dust.
What is the standard height for a wall-mount POS?
Finding the correct ergonomic screen height is critical for staff comfort and efficiency. For a standing workstation, the center of the screen is typically mounted about 60 to 63 inches from the floor, keeping the display at eye level for the average user. However, this should be adjusted based on your specific workflow. For example, when installing the best POS systems for a coffee shop or a busy kitchen, you may need to position the screen slightly higher or lower to accommodate reach and visibility across the counter.
Do I need a specific VESA bracket size?
Yes, the bracket must match the VESA pattern on the back of your terminal. Most of our 15-inch to 21.5-inch touch screens utilize either the VESA 75 (75mm x 75mm) or VESA 100 (100mm x 100mm) standard. Before purchasing a low-profile wall bracket or an arm, check the specification sheet of your hardware model. Using a mismatched bracket often requires adapters, which can add unnecessary bulk and distance from the wall.


